I recently added a Pi500 to my collection. For those of you who haven’t seen this, it’s essentially a Raspberry Pi 5 within a keyboard. Despite not being as powerful as my daily Windows machine, there’s great satisfaction in taking out this device and carrying out typing and general browsing.
The ARM architecture within a Pi is known for being simpler, more lightweight, and great for performance with low-end tasks. This does mean that some applications do not natively work on the Pi and require some workarounds during the setup process.
One of these applications is the Obsidian note-taking platform, which has been growing in popularity for its fantastic Markdown note processing and thought linking. This was something I just had to get onto my Pi, syncing my vault across my other devices.
In this article, I’ll be showing you how to do this quickly and easily. As mentioned above, I’m doing this on the Pi500 running the Raspberry Pi OS.
Step 1: Download Pi-Apps
Pi-Apps is an application that contains a well-maintained collection of app installation scripts that you can run with one click. Using this can really help speed up the process of getting your preferred applications working.
You can install Pi-Apps using the following command:
wget -qO- https://raw.githubusercontent.com/Botspot/pi-apps/master/install | bash
This instruction can also be found on the official Pi-Apps install page.
Step 2: Install Wine 64
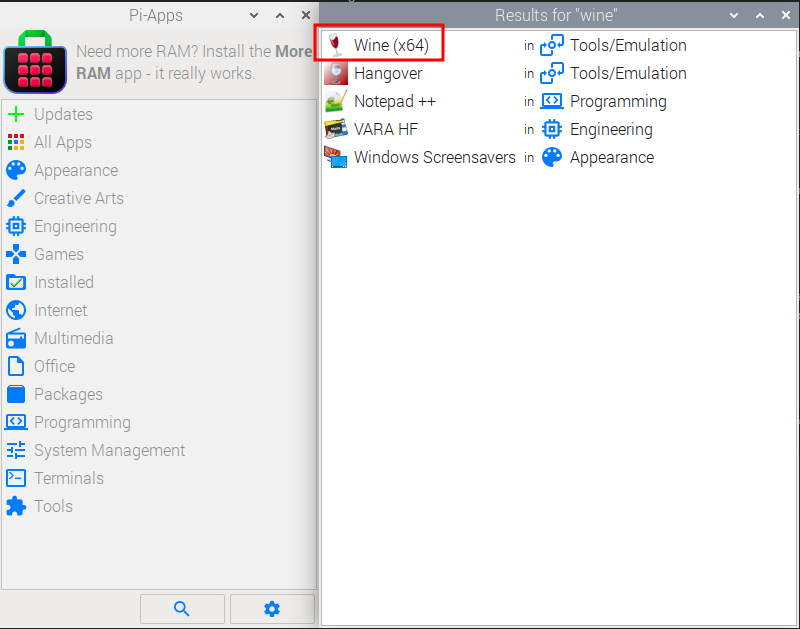
Open the Pi-Apps application and search for Wine 64. Click on the install button.
When I first installed Obsidian, I couldn’t get it to work effectively. The screen would blank out, as though there was a GPU issue. However, when installing through Pi-Apps after the Wine (x64) installation, it worked perfectly!
Step 3: Install Obsidian
Open up Pi-Apps and select the magnifying glass at the bottom of the screen. This will open a search box.
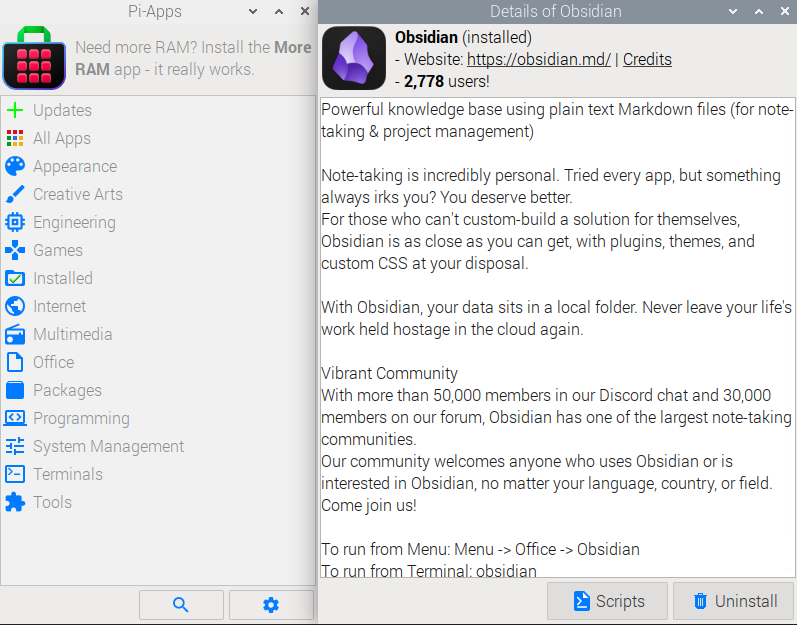
Within the search box, type Obsidian and select Install from the bottom of the page. This will be located in place of the Uninstall button shown in the image above.
Notice the source is Obsidian-MD—the official Obsidian page—which is a bit of comfort when it comes to the security of your vault.
Step 4: Set Up Obsidian Sync

That’s it! Now you can open a blank vault in Obsidian in preparation for setting up the sync.
To sync to your existing vault that has already been set up with Obsidian Sync, head to Settings, then Sync, and finally enter your credentials.
And there you have it—Obsidian running smoothly on the Pi500. It’s a great example of how versatile the Raspberry Pi can be when paired with the right tools. Whether you’re jotting down quick thoughts or building out a full knowledge base, it’s all possible from this compact little keyboard.