Todoist has come to be known as one of the best task managers on the market and makes up a large portion of my own workflow. One of the things Todoist has really got right in their design, is they have almost removed all friction creating a task. No matter where you are, or what operating system you are using, you can capture tasks quickly and easily into your management system, keeping your brain space free for other matters.
Despite the above, there is one area in which Todoist is lacking, and that is its support with Siri. For the avid users out there, I am sure you have come across this frustrating scenario more than once, trying to add a task using Siri while in a place where you are unable to use your hands.
Thankfully, Todoist has a fantastic set of developer tools that enables us to work with their API, making its compatibility with Siri seamless. Best of all, it is extremely easy to do!
What you will need…
- IOS operating system
- Apple Shortcuts (Pre-installed on your iPhone)
- Access to the web or desktop version of Todoist
How to Create the Shortcut

Step 1: Log onto Todoist Web or Desktop to access you API key…
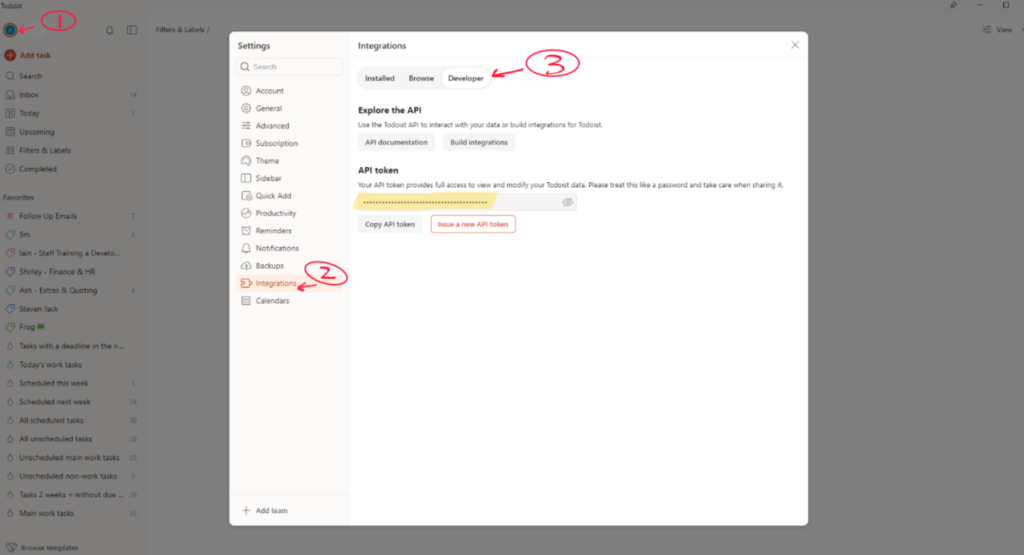
- Click on your name icon in the top left hand corner of the application
- Click on ‘Integrations’
- At the top of the menu, click on ‘Developer’
- Copy your API key. You will need this later.
NB: Do not share this code with anyone!
That’s the first bit done, easy so far hey? Next step is to build the shortcut on your device!
Step 2: Build Your Shortcut
Search for the ‘Shortcut’ application on your iPhone. Once within this, click on the + icon in the top right corner to create a new shortcut and name it “Quick Add”.
Part 1: Capture the content
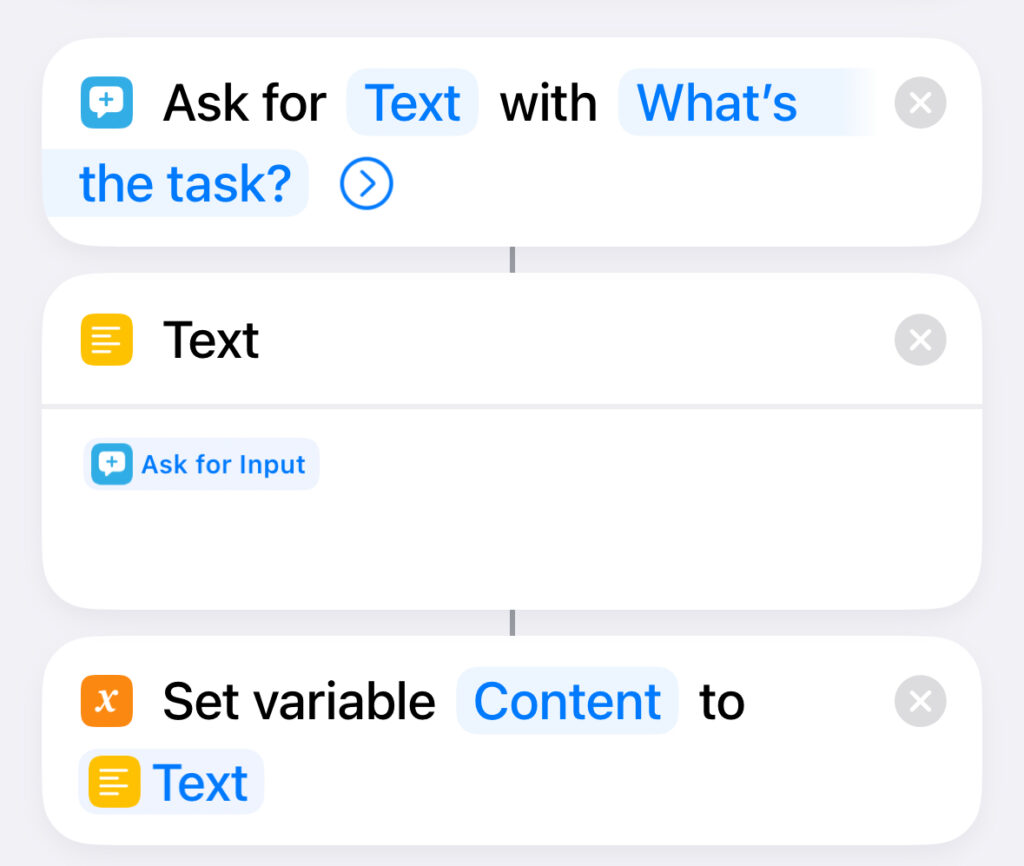
Using the ‘Search Actions’ field at the bottom of your screen, insert the following statements:
- Search for “Ask for input”. By default this will ask for text which is what we would like for this use case. Enter a prompt of your choice in the section after the ‘with’. This is what Siri will ask you when we trigger our shortcut later.
- Next, search for ‘Text’. This gives us the field to capture what we say to Siri in a text block.
- Finally, search for ‘Set Variable’. Click on the parameters and change them to match the picture if required. This allows us to access the text stored when using the next commands.
Nearly there…
Part 2: Post to the API
To post to the API we are going to be using the instructions from the developer page on Todoist for “Quick add an item“. This is relatively simple and will allow us to make use of the natural language when carrying out our voice commands. Don’t worry if you don’t understand the document and don’t be intimidated by the upcoming picture, follow along below and you will be up and running in no time!
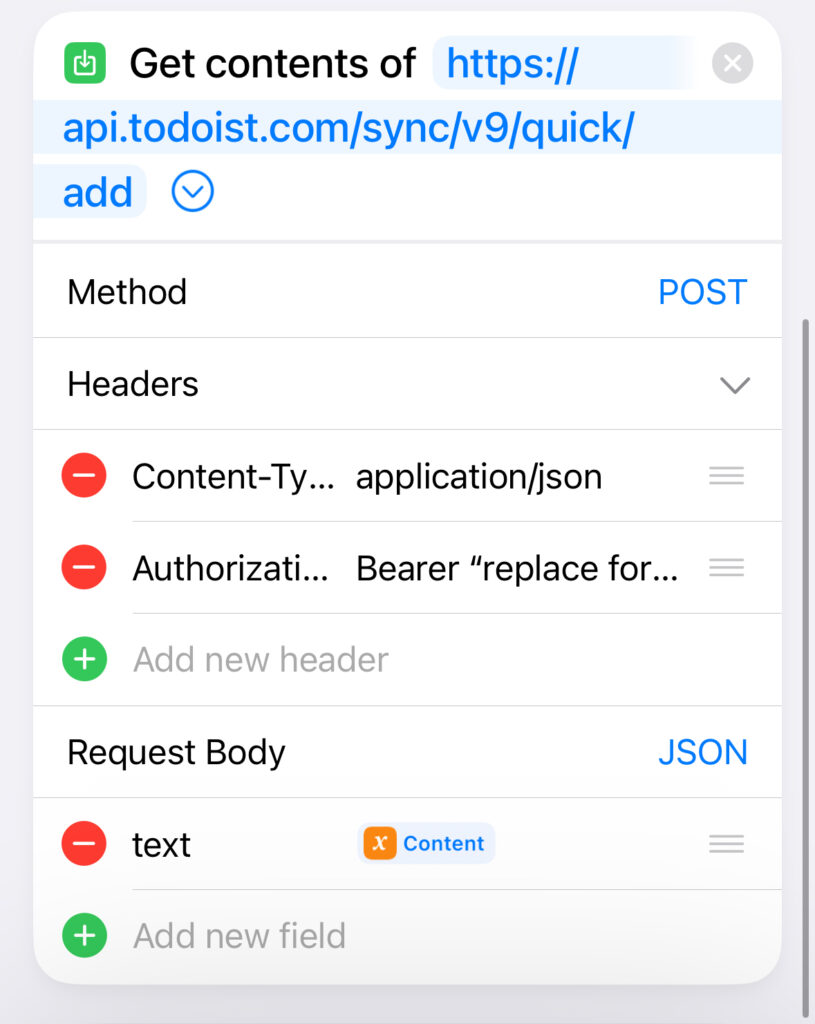
- Search for “Get contents of URL” and add this to the shortcut
- Paste this URL into the field: https://api.todoist.com/sync/v9/quick/add
Method Section
- Change the method to ‘POST’ as we will be submitting information as opposed to receiving it.
Headers Section
- The first header is to tell the server we are submitting JSON data. This is how Todoist will read and process our input. Make the first as follows:
- Key: Content-Type
- Text: application/json
- The next header is where insert our API, giving the permissions to interact with our account. The second header should be as follows:
- Key: Authorization
- Text: Bearer ENTER_YOUR_API_HERE
Request Body Section
- Click on ‘Add new field’ and make it ‘text’ type.
- The key and text fields should be as follows:
- Key: text
- Text: Change this for your ‘content variable’ we made earlier
That is your shortcut made! The next step will allow your shortcut to run when the your iPhone is locked. This is useful for when you are on the move or driving.
Part 3: Allow the Use of The Shortcut When iPhone is Locked…
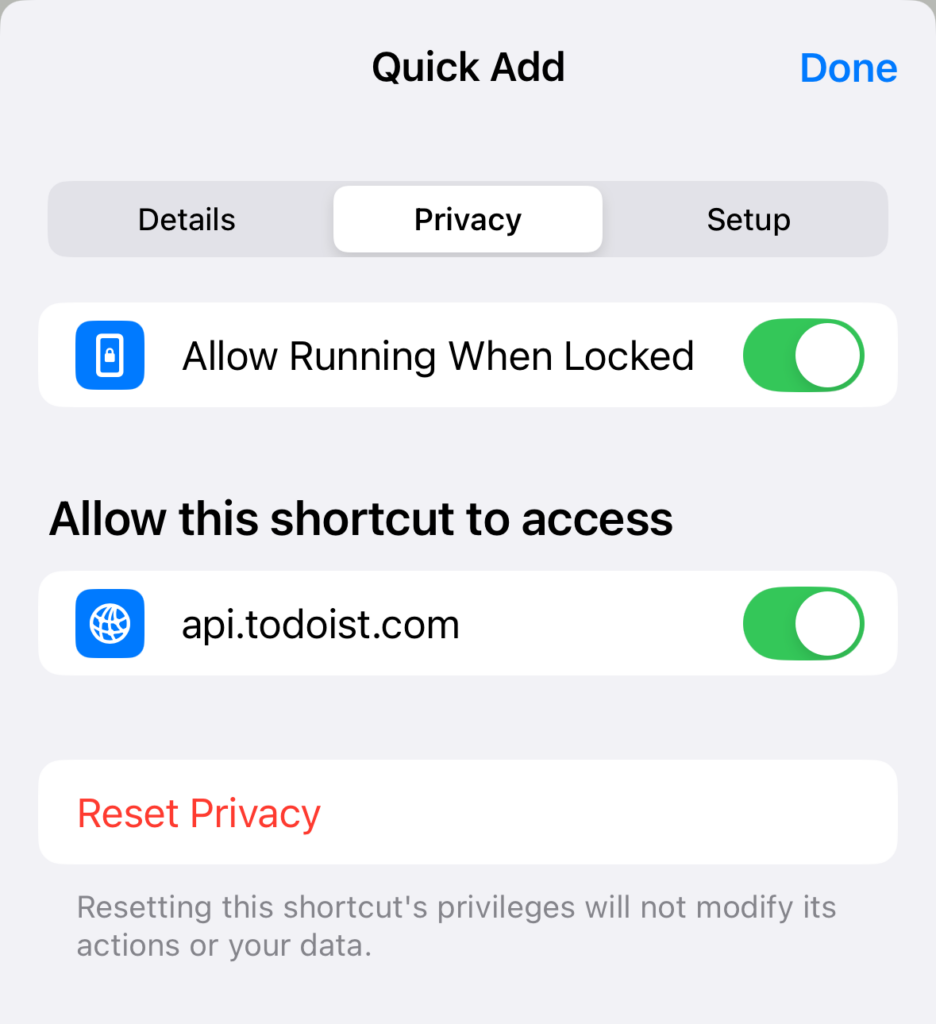
- With your shortcut open, at the bottom of the page you will see an ‘i’ within a small circle. Click this.
- Open the ‘Privacy’ menu
- Change the toggle position on ‘Allow Running When Locked’
Using the Shortcut
You have done it! How easy was that?
To use your shortcut, say “Hey Siri, Quick Add!”… you will now be prompted to say your task.
Don’t forget to make use of the natural language e.g.
- Schedule today: “Today”
- Schedule on the upcoming Monday: “Next Week”
- Add to a project called work: “Hashtag Work”
If this has helped you, please do share with others!

